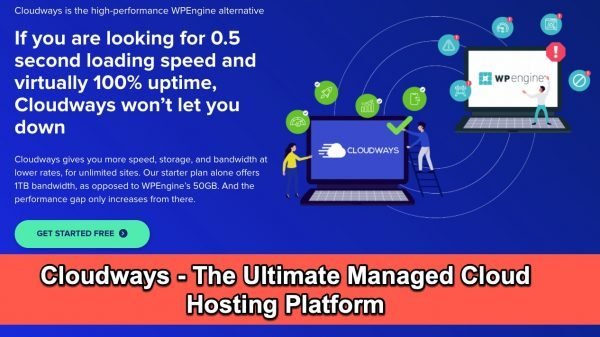
Who doesn’t want 0.5 second loading speed and 100% uptime!
The managed cloud hosting platform Cloudways with built-in CDN guarantees unmatched performance, reliability and choice with 24/7 support, making it an ultimate choice for growing agencies and eCommerce businesses.
Cloudways provides all the tools to manage your WordPress sites whilst using one of the top 5 Cloud Providers to host your site: DigitalOcean, Linode, VULTR, Amazon Web Services (AWS) and GoogleCloud.

These hosting providers have multiple data centres across the world – your content loads fast no matter where your visitors access your content from (CDN).
Cloudways allows you to run your own applications on your own servers (there is no need to share your resources with others). WordPress is just one of the 13 applications that you can run on your server.
Get Cloudways Hosting
Getting WordPress hosting from Cloudways is easy. Just follow these steps.
Total Time: 10 minutes
-
Go to Cloudways site
Use my referral link (it wont cost you extra).
https://vjdesign.com.au/referral/cloudways/ -
Go to Pricing page
Before we sign-up, lets choose our hosting provider.
From the top menu, click on Pricing link.
-
Pick up a cloud hosting plan – Find an affordable hosting plan with a data centre close to you
There are currently 5 hosting providers. Digital Ocean is selected by default.
1. Click on each of the Data Centre links to ensure that your server is close to you.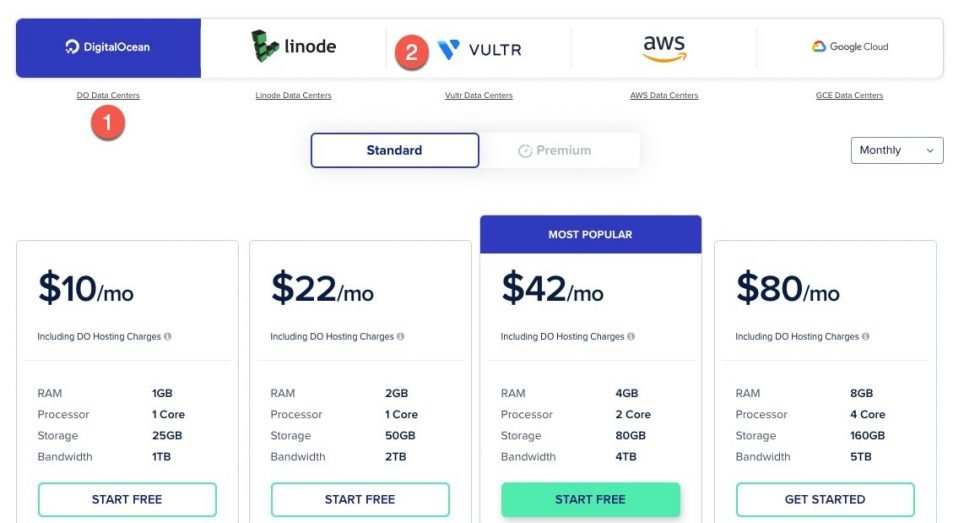
2. Then choose a hosting provider. Click on each of the provider and have a look at their plans.
-
Decide your hosting provider and plan
1. I chose VULTR. They have 16 data centres – one of these is in Sydney, Australia.
2. Select High Frequency – for an extra dollar get better hardware than standard machines and deliver superior performance for high CPU demanding workloads. This is the best hosting for its price comparable to the very expensive WP Engine.
3. Choose a plan – the basic $13 pm is good start – you get 32GB server space, 1GB RAM and 1TB bandwidth per month – this is more than enough for most small business users. Click on Start Free for $13/mo plan.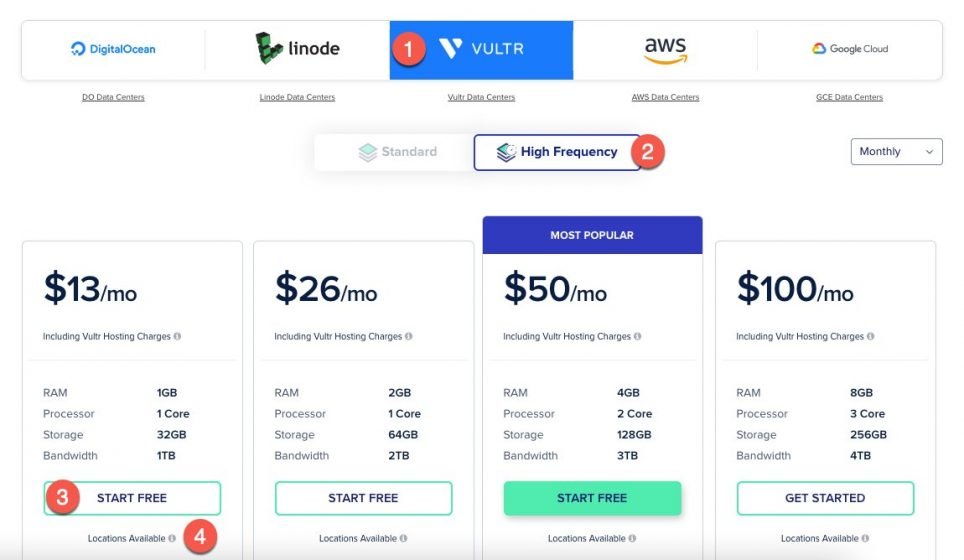
-
Signup
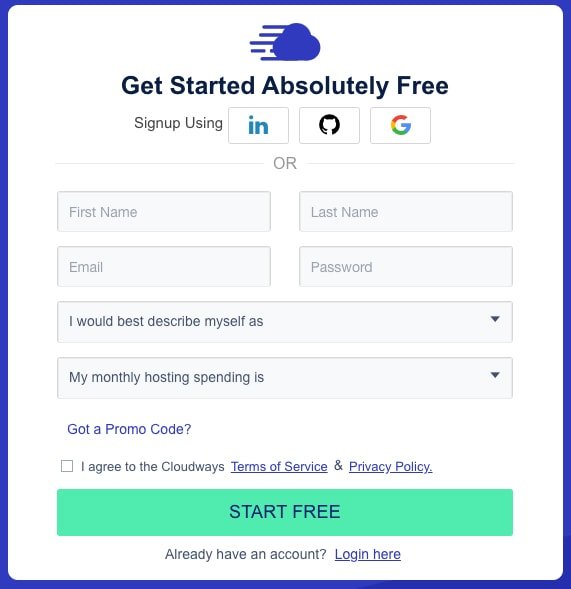
Signup for Cloudways using LinkedIn, Github, Google or using your Email.
-
Login
Once signed-up, you will be prompted to activate your account before you can login. Click on activation link sent to your email.
Login using this link https://platform.cloudways.com/login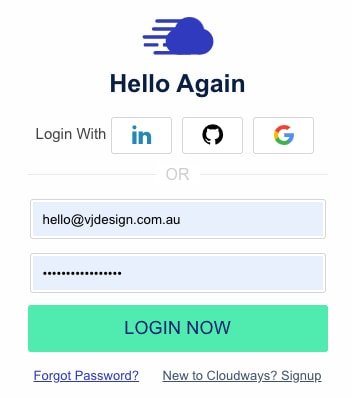
-
Free trial for 3 days – Upgrade to keep services
Cloudways offers a free trial for 3 days; this allows you plenty of time to check the offering.
Click on Upgrade My Account button.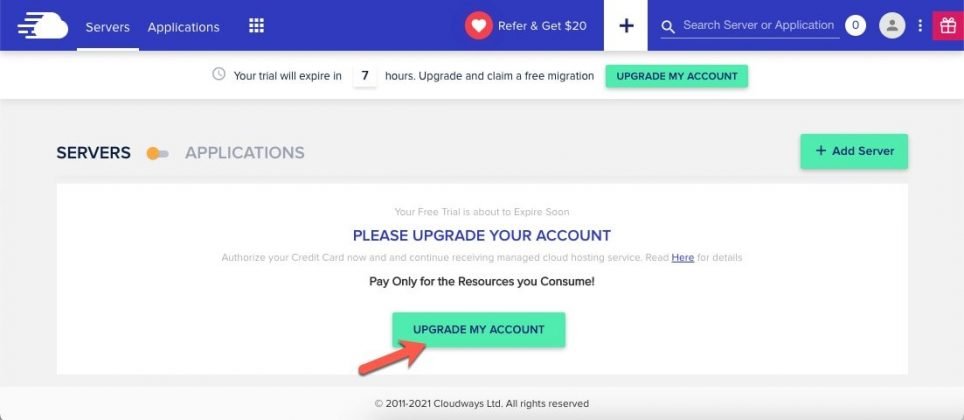
-
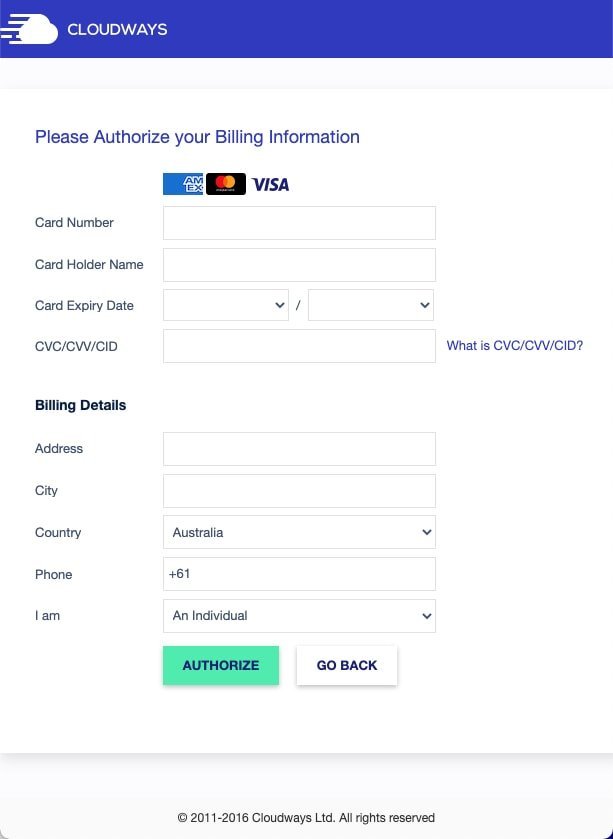
Pay for your account
Set up your billing information – you will be charged only for what you use monthly.
-
Share your credentials
– If you are setting up WordPress yourself, then continue step 10 below.
– If you want me to set up the site for you, then let me know which hosting plan you have chosen (ins tep 4). Also provide me the username and temporary password (temporary until I finish set up). I will direct your domain, install WordPress, required theme and plugins and design your website to your needs (and then you can change your password).
-
Set up WordPress server
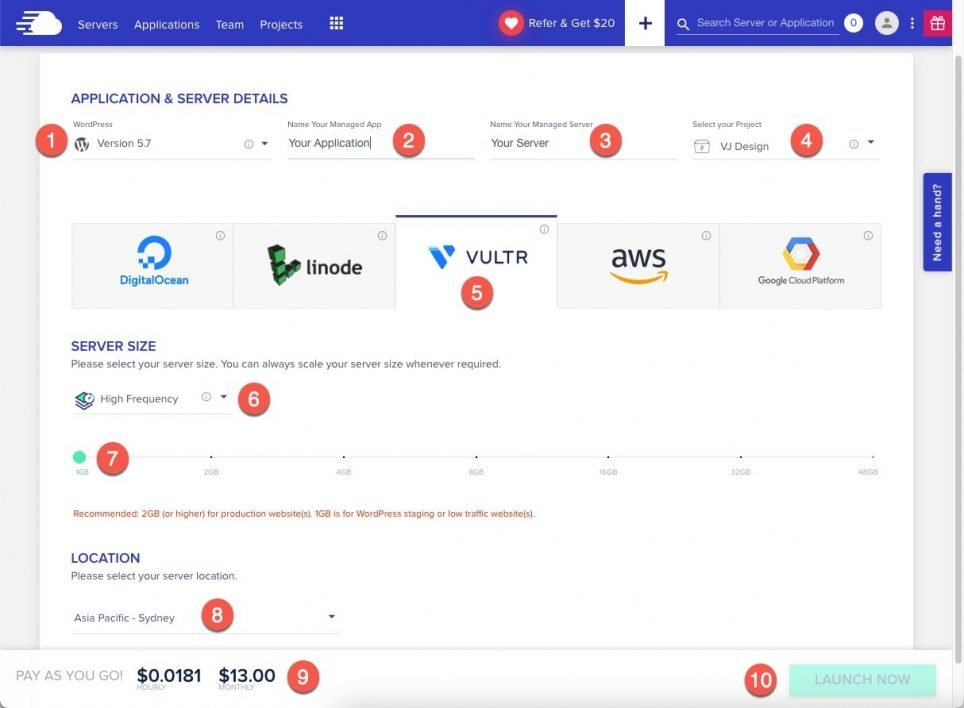
Once logged in, from the server page, select + Add Server button (or click on + from top menu).
1. Select the application you want to install e.g. WordPress
2. Give your app a name (you can run multiple apps)
3. Give your server a name
4. Group your app into a project (this is useful when you are managing multiple servers and apps for multiple clients)
5. Select the hosting provider (I chose VULTR)
6. Select a server type – I chose High Frequency
7. Set a server size – e.g. 1GB. You can always scale up later.
8. Set your location – I chose Sydney
9. Confirm you are ok with the price
10. Click Launch Now.
-
Servers and Apps
It takes 10-15 mins for your servers to be provisioned and your app to be installed.
Go to https://platform.cloudways.com/server to see all your servers. The default server settings should be fine for now. Go to Applications
Backups – I would recommend you enable backups later. Click on the server (I called mine WordPress) then click on backups tab.
-
WordPress Application
WordPress is one of the 13+ applications that you can install on your server.
Go to https://platform.cloudways.com/apps to see all your applications.
Click on the application (1) for more details or checkout your new WordPress website (2).
-
Manage your application
Cloudways offers easy to use tools to manage your WordPress application.
1. These include the username and password to access WordPress dashboard.
2. Cloudways sets up your site and provides a temporary dummy URL for testing and building your site. Use the Domain management tools to make your site live.
3. Ensure your site is secure using free SSL certificate. This is a must have for eCommerce stores.
4. Create manual backups of your WordPress app – it is better to create complete server backups instead.
5. Cloudways offers CDN for just $1 for 25GB or you could set up free Cloudflare CDN. For more information, refer to Which CDN Is Better For You?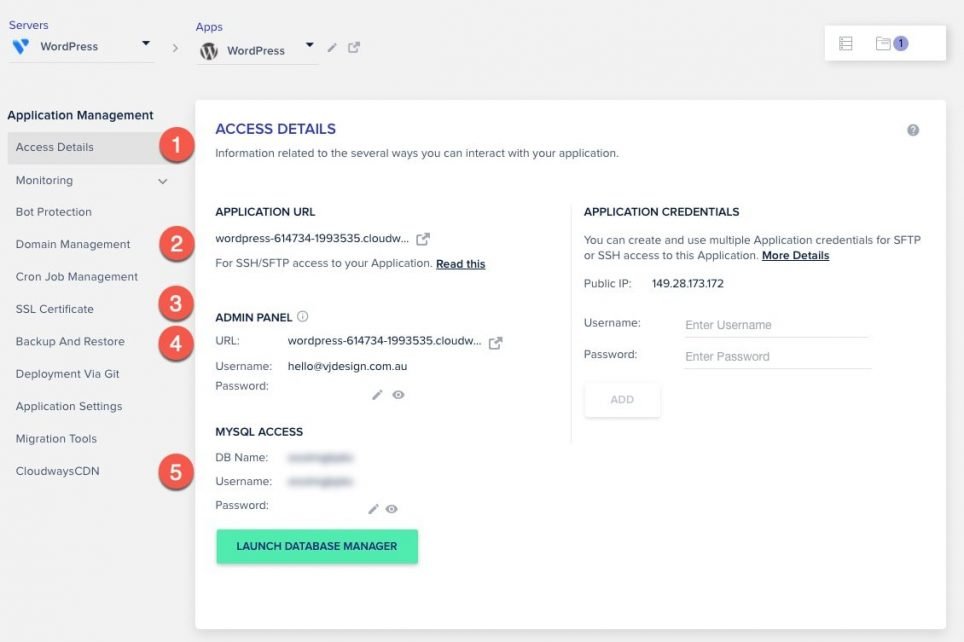
No Email Hosting
The hosting providers on Cloudways don’t provide email hosting. Cloudways provides email services as add-ons. You can choose to send emails through Gmail SMTP server for free or get fully managed Rackspace Email Hosting for just $1.
Conclusion
If you are after super fast load times, then Cloudways offers excellent speeds and uptime at an affordable price.


Cloudways is an excellent choice for manage WordPress hosting. It provides all the necessary tools to manage your site easily. You can select from a variety of hosting providers, including AWS, Google, Vultr, Linode, or DO.